Pages

Monday, October 22, 2012

Please Excuse the Long Absence...I have been working on something really CUTE!!!

I know I have been gone from blogland WAY to long! But hopefully you will forgive me when you see what I have been up to.

Please meet the newest member of our family!
Gwendalyn Clare 
October 5th 2012
10:03 am
7lb 4oz
21 inches

We are loving every moment of this! Trying to soak it all in. However I don't expect to spend much time on the blog in the next month or so, cause we are also trying to move in the first of November! So bear with me, I promise I will be back and hopefully with lots of fun stuff:)

Thursday, June 21, 2012

Cheapo, Easy Peasy Luggage Tags!

Our Family is preparing to take several trips this summer. Unfortunately one of them is by air ( I HATE flying!!!). So in a better effort to be prepared, and not have to fill out those annoying little tags at the airport, I whipped up some Luggage Tags.

Here are the gathered supplies:
Some scraps of Scrapbook paper, Scotch Laminating Pouches, Card for smoothing, Printable Shipping Labels, Crop-A-Dile, and optional corner rounder punch.

Now I figure that most people are at Wal-mart enough that have seen these awesome little pouches. But encase you are like me and don't spend enough time perusing the office supply aisle there, here is a close up:
These are less than 2 bucks for a pack of 5, and are self laminating (NO machine required).

The tags were all made by simply printing off my info on the shipping labels (which had to be cut to size & corner rounded them), and then adhering them to the scraps of  paper. I sized my paper 3 1/2 by 2. but you could totally eyeball this part. Then I stuck the paper on the pouch and followed the 2 step directions for sealing it. And VOILA! and cute little tag. I then used my crop-a-dile to punch a hole through all the layers to thread a ribbon for tying. You could try a regular hole punch, but the pouches are pretty thick...
Aren't you jealous of my awesome tech skills that caused me to use a bright orange post-it to safe guard my personal info?!? Alas that is SO not my thing:/
Here is the trio of them, ready for me and the kiddos to attach to our duffels and go:) Not my best work, but definitely some of my easiest and quickest! These literally took me 10 minutes start to finish:)

Monday, June 11, 2012

My Van Basket- Or what you need when you constantly run Errands!

I am an "On-the-Go" kinda Gal. We are in our vehicle running around town, doing errands at least 5 times a week. So I have learned that a few necessities are in order, so that I am not constantly buying things that I already have at home.
I own a Nissan MiniVan. It has a handy little "table" that sits in between the 2 front coach seats. This is where I keep my little basket of goodies. However I am sure there are plenty of spots in other vehicles to tuck such a thing.
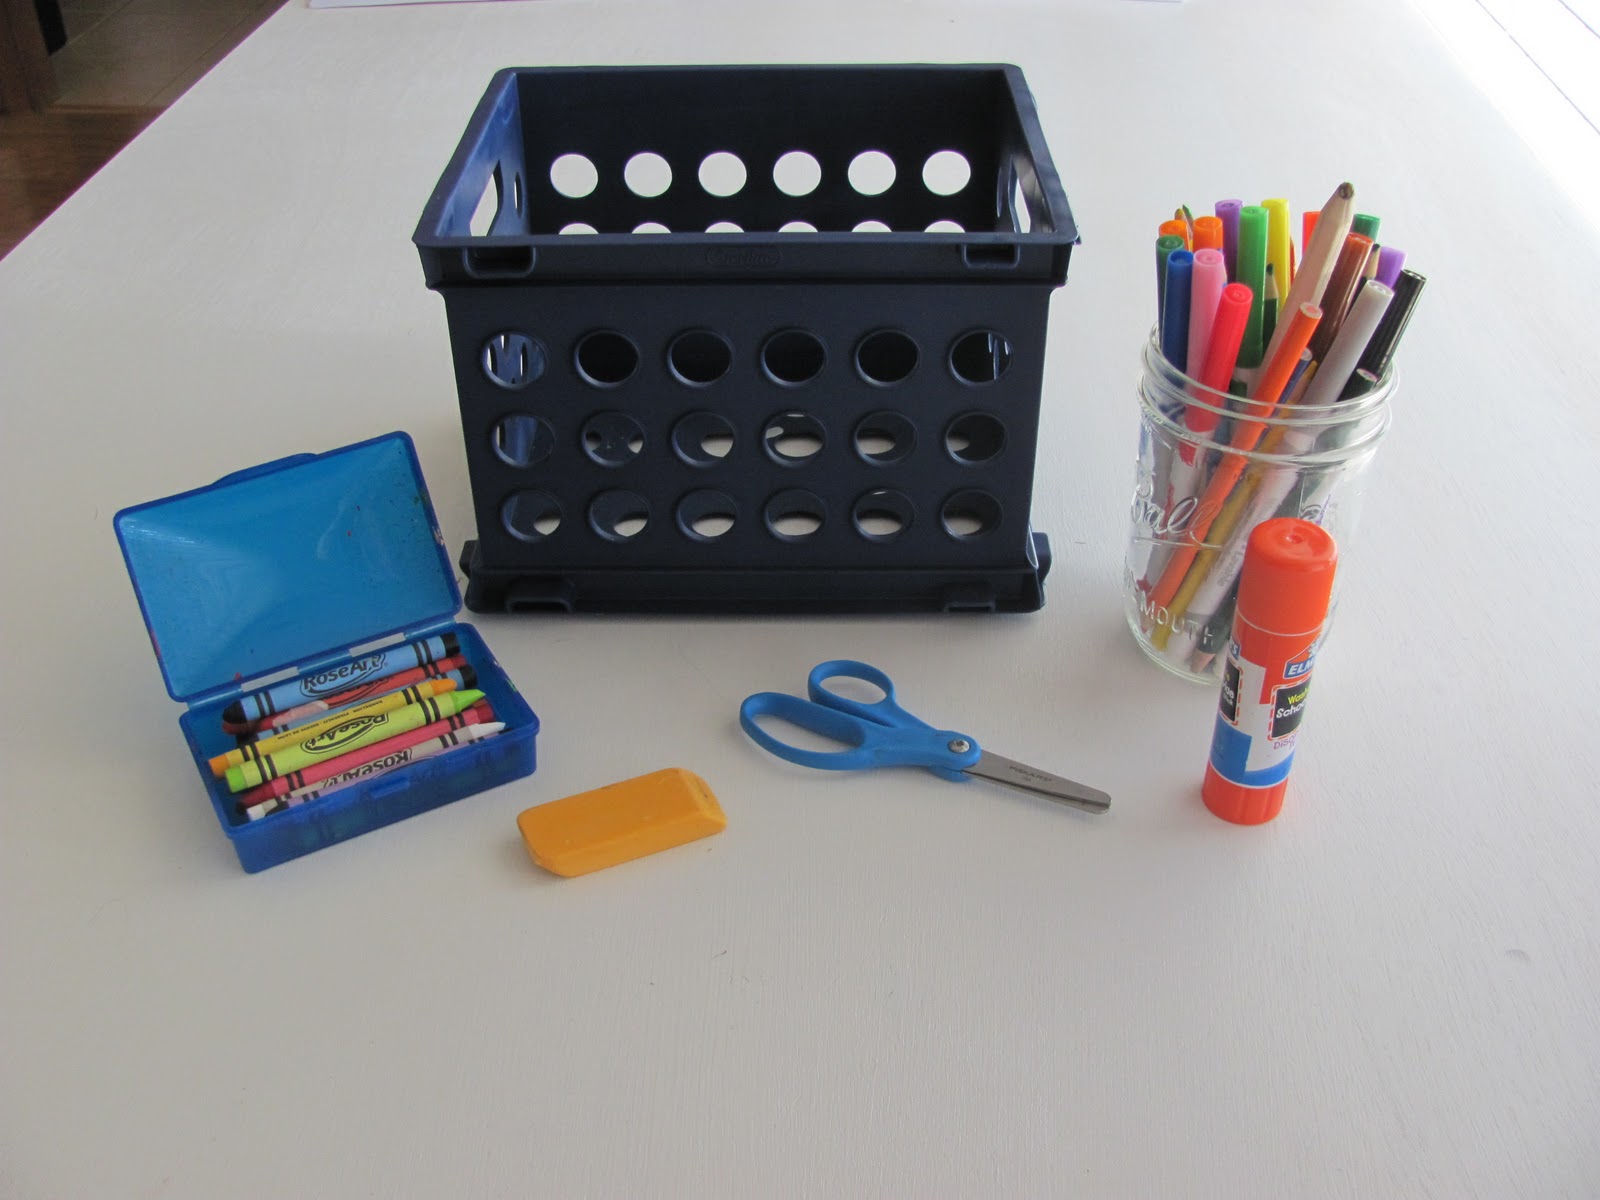
This is what my basket looks like:
It contains 5 Main Components:

1) The First Aid! The School Size box in the back contains first aid supplies:


Nothing fancy or expensive here. Everything came from Target or a Walmart, and most is "travel" size. I have Tums, Tylenol (Both Adult & Children's), Dramamine, Benadryl, Single Packets of Sinus Medicine & Advil, Children's Benadryl & Zyrtec Single Serves, Band-aids, Gauze, Alcohol Pads, Hand Sanitizer and Kleenex. Some Odd Ball items are Bug Spray (for impromptu outdoor outings, and Tweezers for Splinters & Ticks). I usually keep a Travel Size Sunscreen in there also, but I had run out and hadn't replaced it at time of photo.

2) The Fun! The slim green box contains a few items to keep the kiddos entertained for those times we are stuck waiting in the car.
Again nothing special. I got all items except the travel "Whoonu" game at Target. I snagged the Tic Tac Toe at the little dollar spot, The Wooly Willy boards and Stretchy Caterpillar are from Party Supplies, while the Squinkies were actually from my stock pile but of course you could get them in Toys. The Travel Whoonu Game came from a kids meal!

3) The Food! The tiny clear case contains non-melty snacks.
We honestly eat in our Van a ton! So I felt no need to stock pile a great deal of snacks. I simply threw in some hard candies & some teeny packs of fruit nuggets.

4) The Paper Products. What vehicle that regulars shuttles children would be complete without the Kleenex and Wipes!
My kids are older now, so I just keep a travel pack of wipes for sticky hands. However I have a some what "snot nosed" 9 year old, so I need a full size box of Kleenex!

5) The Oddities. These are items that we simply cant do without, however I doubt most people would need to add these items to their Vehicle Basket.
The yellow capped tube is an Epi-pen. I have a severe allergy to shellfish, and while this is never a worry at home, eating out can be more dangerous. So I keep this in my van at all times. The weird black thing is a convertor for our car charging ports. It makes any port in the van (we have 3) compatible with a regular ole cord. So my kids can use their DS chargers or watch our Portable DVD player.

 It all tucks nicely and neatly in my Little Longaberger Lunch Basket!

So that wraps up my Travel Around Town Basket. Hope you got a good idea or two!

Saturday, June 2, 2012

Tiny Toy Travel Tins

My Gilly has 2 sweet friends that are moving to Germany. She really wanted to make them a gift before they left. However her overly practical mother wanted it to be something they would actually use, and something that their mother wouldn't inwardly groan over. I knew they would be traveling all over the country for the next couple weeks before their flight to Germany, so I figured travel activities would be appropriate. However I also knew that they already had reached their max on stuff they could/would drag around during their travels so it would need to be something small.

So my first thought was a travel game. But even the smallest travel games aren't truly "tiny". They are more backpack size not purse size. Then I was excited over the idea of paperdolls. But once I had that thought I realized I would at least need to include scissors and a zipper bag for storage, not to mention the fact that once I shopped around for paperdolls I wasn't able to find ANY in town! I would have had to order them online, so I scratched that idea.

On one of my many trips to Target, Gilly actually found these cute little tins in the dollar spot and begged to get them for her friends.
The Sharpie is there for size reference. The tins are a little bigger than an Altoids tin, just exactly the right size to fit a deck of cards. So my new mission became finding things to entertain 2 girls that would fit!

I started by heading to my local party store where I hit the jackpot. I found tiny packs of game cards (Uno for one of the girls and Old Maid for the other), little bitty Etch-A-Sketch, some stretchy caterpillars. They also sell all kinds of candy by the individual piece so we grabbed a jolly rancher because we happen to know they are one of the girls favorites.
When we got home I raided my stash of stuff I keep for Gillyan's "GrabNGo" bag (that is a a post for another day) and found some "party favor" packs of paper dolls. Each doll came with a sheet of reusable stick on clothes. I also had hoarded these fun little packages of Squinkies that came with a little cardboard pop up playset and a little squinkie person. We added an additional squinkie pet with hair just cause we have squinkies come out our eyeballs around here:P
This rounded our little kit out pretty well and so all that was left was to cram all the goodies in and make sure it all fit! We started with the flat things, the paper dolls and squinkie playset, and then layered the other items on top. It fit beautifully!
Gilly was thrilled with the results and wrote a sweet note to her friends on the bottom of each tin with Sharpie. I was pretty thrilled myself but mostly because I have a slight obsession of tiny things that I inherited from my mother;)
The whole little package cost about $5 if you average out the cost of things that came in sets like the paper dolls, caterpillars, and tubes of plastic ballons. The little etch-a-sketch was the most spendy item (around $2 each). Although I did acquire the squinkies at our local PX on clearance so the cost on those is probably not a good "average" either:/ I wasn't complaining though, and I don't think the 2 little recipients will be either:)


Wednesday, May 9, 2012

2 minute-10 Dollar Teacher Gifts!

So since I homeschool my kiddos, I often let teacher thank you gifts sneak up on me!! But I am truly thankful for the break that I get from the time they do spend away from me, so I want to make sure I give them a little something to let them know that:) This is my guys last week at Awanas, and each kid has 2 teachers and they have one coordinator that I adore! SO I had to come up with something to show my appreciation. I scoured pinterest and some of my favorite blogs and came up with this twist on a couple of ideas. For the 4 lady teachers I went to Old Navy and had the kids each pick 2 pairs of flops (totally guessed at the sizes!). Then we went to Target and picked out coordinating nail polish. Since Gideyon has a guy teacher that he really likes, I asked him what wanted to give Mr. Eric and he said "Candy". So we went to Wal-mart and picked up a fun reusable cup and some skittles. While I was there I saw some really cute beach towels that were only 5 bucks! So we found one to go with each pair of flops, and the cup. When I got home I bundled it all up and tied it up with a plain ole white ribbon. Here is the results:


Here is the break down: Each Ladies Gift had Flops $2 (I had a coupon!), Nail Polish $2.50, and a coordinating Beach Towel $5. So they come in just under 10 Bucks and look fun and summery!


The gift for the Mr. Eric came in just over $10 dollars but was still pretty cute! Cup was $4.50, Towel was $5, and the Skittles were almost $2. Still not to spendy, and lets face it...Someone that has to deal with Gideyon every week should get a nice gift!

Sorry I haven't posted much (i.e. AT ALL!) but life has been hectic since finding out that we are expecting our 3rd. Plus we moved in the last month! But I promise to be back soon with a cute travel tin idea, and some car organization tips.

Wednesday, February 8, 2012

Hands on Chemistry Fun

I teach a Chemistry Class at our local Co-op for our 1-3rd graders using the Chemistry book from this Publisher. It has been SO fun and easy that I thought we would continue the fun at home. I let the kids use the leftover supplies from this mornings lesson on Acids, Bases, and Neutrals to make their own chemical reactions. They LOVED it!!! Want to have some Chemistry fun in your own home? Here is what we used:

  • Lemon Juice
  • Mineral Water
  • Baking Soda
  • Distilled Water (THIS is important for making the other mixtures)
  • Cabbage Juice (Red Cabbage boiled in Distilled Water and Cooled)
  • Vinegar
  • Antacid Tablets in Distilled Water
  • Old Shirts (Cabbage Juice STAINS!)
  • Clear Disposable Cups (Disposable Optional, Clear is NOT)
 Allow the kids to start by mixing 2 liquids of their choice (About a 1/4 a cup) and then note the reactions. Both the kids and the chemicals:) They will soon figure out that most of the liquids mixed with the base baking soda will fizz when mixed with an acid such as lemon juice or vinegar. They love watching the colors change when adding the cabbage juice to things, which acts as an indicator. SO fun and so educational. Here are a some pics for proof!


My two little Chemist had a solid hour of fun with this! They really got a kick out of the combinations that erupted:) Well worth the mess on the deck and the $10 in supplies!

Monday, February 6, 2012

Muffin Tin Monday- Football Fun

I had NO inspiration for today's muffin tin:P Luckily for me Gilly requested Football Brownies in them, so I went that. So this poor little muffin tin is lacking the usual pizazz.


I served them a football shaped sandwich, juice box, pretzel sticks with a cheese round, cinnamon applesauce, craisins & almonds, and the requested football brownie:) Always cracks me up that the ones I consider Ho-hum are some of their favorites!

Monday, January 30, 2012

Muffin Tin Monday- Snow Much Fun!

I have had this muffin tin in my head since before Christmas! But I kept hoping that maybe we would get a few flakes to along with it. End of January and in the 70's so I decided I better go ahead and do it before Easter:P

Nothing to complicated about this one, just fun to look at!
Each of their tins had snowman head donuts (mini donuts with a sixlet nose and mini chocolate chip eyes), glass of milk, PBJ Snowman Head Sandwich (with raisin eyes and a mini carrot nose), blueberries with a snowflake pick, vanilla yogurt with snowflake sprinkles, and some extra snowman noses (carrots). Gillyan thought today's lunch was SO cute! Gideyon couldn't figure out the theme, go figure he is such a guy:/ Linking up to Muffin Tin Mom

Hoping to be back soon, to share some misc fun from last week!

Wednesday, January 25, 2012

Whatever Goes Wednesday-Bento: Yellow Stars

I am sure nobody was to sad that I didn't post a muffin tin this Monday. But I thought since I didn't I would post my kiddos Bento from Co-op today. I went with an easy peasy theme: Yellow Stars.
I think I was trying to challenge myself to see if I could make a monochromatic yet nutritious lunch:) Here is what they ended up with:

I put fresh pineapple chunks in one square, pirate booty in the next, vanilla yogurt with star sprinkles and a tiny appetizer spoon, and lil star shaped sandwiches. I had to stick in a golden oreo, because my guys do NOT consider yogurt dessert:P

Monday, January 16, 2012

Muffin Tin Monday-Appetizer Tray

Today's muffin tin should actually be called "Cleaning out the fridge Cups" but I thought Appetizer Tray made it sound more appealing;) Here is what I ended up putting in my kiddos tins:

They have Herbed Turkey Pinwheels, an Orange Izze, a tiny cheeseball with mini Triscuits, some Marcona Almonds, a baby slice of Red Velvet Cheesecake (Leftover from my Bday) and some Grapes. Pretty sure I could have put liver in the tins today and they would have ate it just so they could have the dessert!:) So not one of my prettier, or more creative tins but tasty nonetheless!

Monday, January 9, 2012

Muffin Tin Monday-Breakfast Bites

I was actually excited to do a more "traditional" muffin tin after all the Christmas tins. So this weeks tin was simple but cute. I went for a "mini" breakfast theme. I have a slight obsession with all things tiny/small/miniature:/
The kids tins looked like this:

They contained from top left to bottom right: Mini Pancakes, container of syrup, Chocolate Milk, small thing of yogurt, mandarin oranges, and baby sausage links. The utensils were a tiny spoon & pick meant for appetizers. The kids gobbled these down, and needless to say I had to refill more than one cup;) Linking to Muffin Tin Monday

Friday, January 6, 2012

Friday Fast Five- Homeschooling Tools Favorites

One of my 2 dear readers (Yes Aunt Dawn & Clare that's you!) requested that I put the new school table my husband made on my blog so she could pin it. So for today's fast 5, I am showcasing 5 our schooling essentials.

1) Our NEW School Table WootWoot! This baby was a piece of cake to make. I bought 2 cheap shelves at Wally World, and had my husband paint a blank door to match. He attached to the door to the assembled shelves with L brackets and Wall-la. A very useful/huge school table! Now to be honest this was about a $60 project with paint and brackets and everything. Plus it is slightly taller than a normal table so regular chairs don't work for kids. We are buying our guys saddle style stools (that also happen to come from Wal-mart). Just giving you the low down so you don't yell at me later;)


You will notice all the items on each kids "end". Those are the components to the rest of today's 5.

2) Their Daily Binders. At the beginning of the school year I bought each kid a cute binder and double sided pocketed dividers.


On each Pocket Divider I put one of the days of the school week.
On Sunday nights I take work out their Math Books, Spelling, Phonics, Etc. and put it in each day's front pocket accordingly. For those subjects that don't have tear out pages, or that have to be read aloud, or something "unpocketable" I put labels on that day's front pocket to remind the kids that we have to do those subjects also. For instance Bible and Science are mostly read aloud subjects, and we always do history together. The pockets are mainly for their "work alone" subjects.

Once that days work is completed it goes in the back of that days' pocket, so I know it is ready to be graded. I LOVE this system and it works really well for us. The kids know what needs done, and I can keep track of what is getting accomplished.

3) These HUGE white beasts are the kids cumulative binders. Once work has been accomplished for that week and graded, I move it to these binders. I keep these to show what they have done for the year.


I keep a clear page protector in the front to hold school work that isn't "hole punchable" such as unit work or crafts.

4) Each of the kids has their own Workbox. This holds all their essentials for schooling. They aren't suppose to use these for any other time. But I can't tell you the amount of times, I have been hollering because Gidey has lost his scissors, or someones gluestick was in their room:/

This small crate holds: A soap dish full of crayons, eraser, scissors, gluestick, and a jar with Markers and Colored Pencils. The kids actually really like this system and we seem to be able to keep up with things better than previous years.

5) Homeschooling...or is it Van Schooling?
My last item is the kids customized clipboards. I hate to admit but we school on the go sometimes. So the clipboards are awesome because they just grab the work from that days binder pocket, attach to clipboard and go. We usually bring a pencil pouch and sharpener too.

There it is folks some of my favorite school tools. I also have an awesome planner that I should share with you sometime...