Pages

Sunday, December 12, 2010

And the winners are....

Last week was SO fun! I hope you got at least an idea or two, or just had a good time entering all the raffles. But I won't drag this out, I will get on to all the winners! I again used Random.org to decide the winners, and ran the numbers again if the same person won so everybody would have a chance to win something. If you gripe at me I promise to send your gift to someone else!;)

Day 1- Winner of the Ribbon Twirler: Rachel Dawn
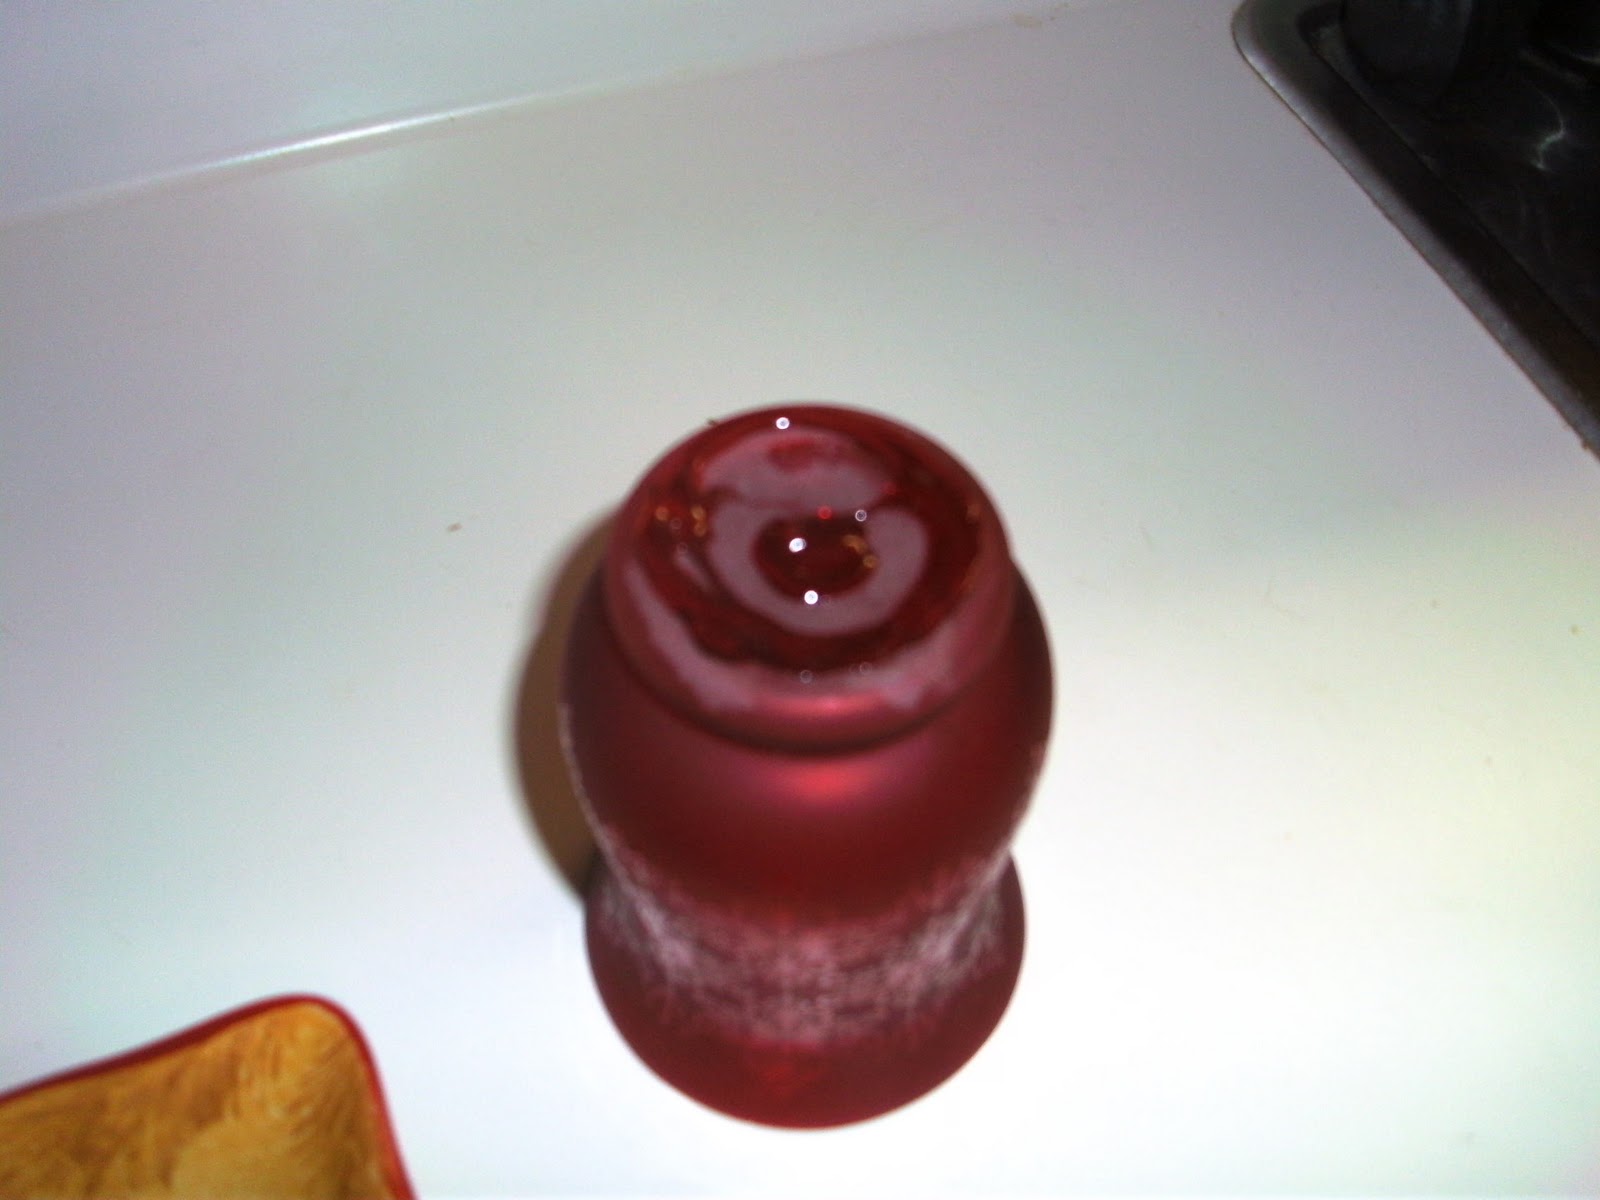
Day 2-Winner of the Jar of Nuts: Grams/Lisa
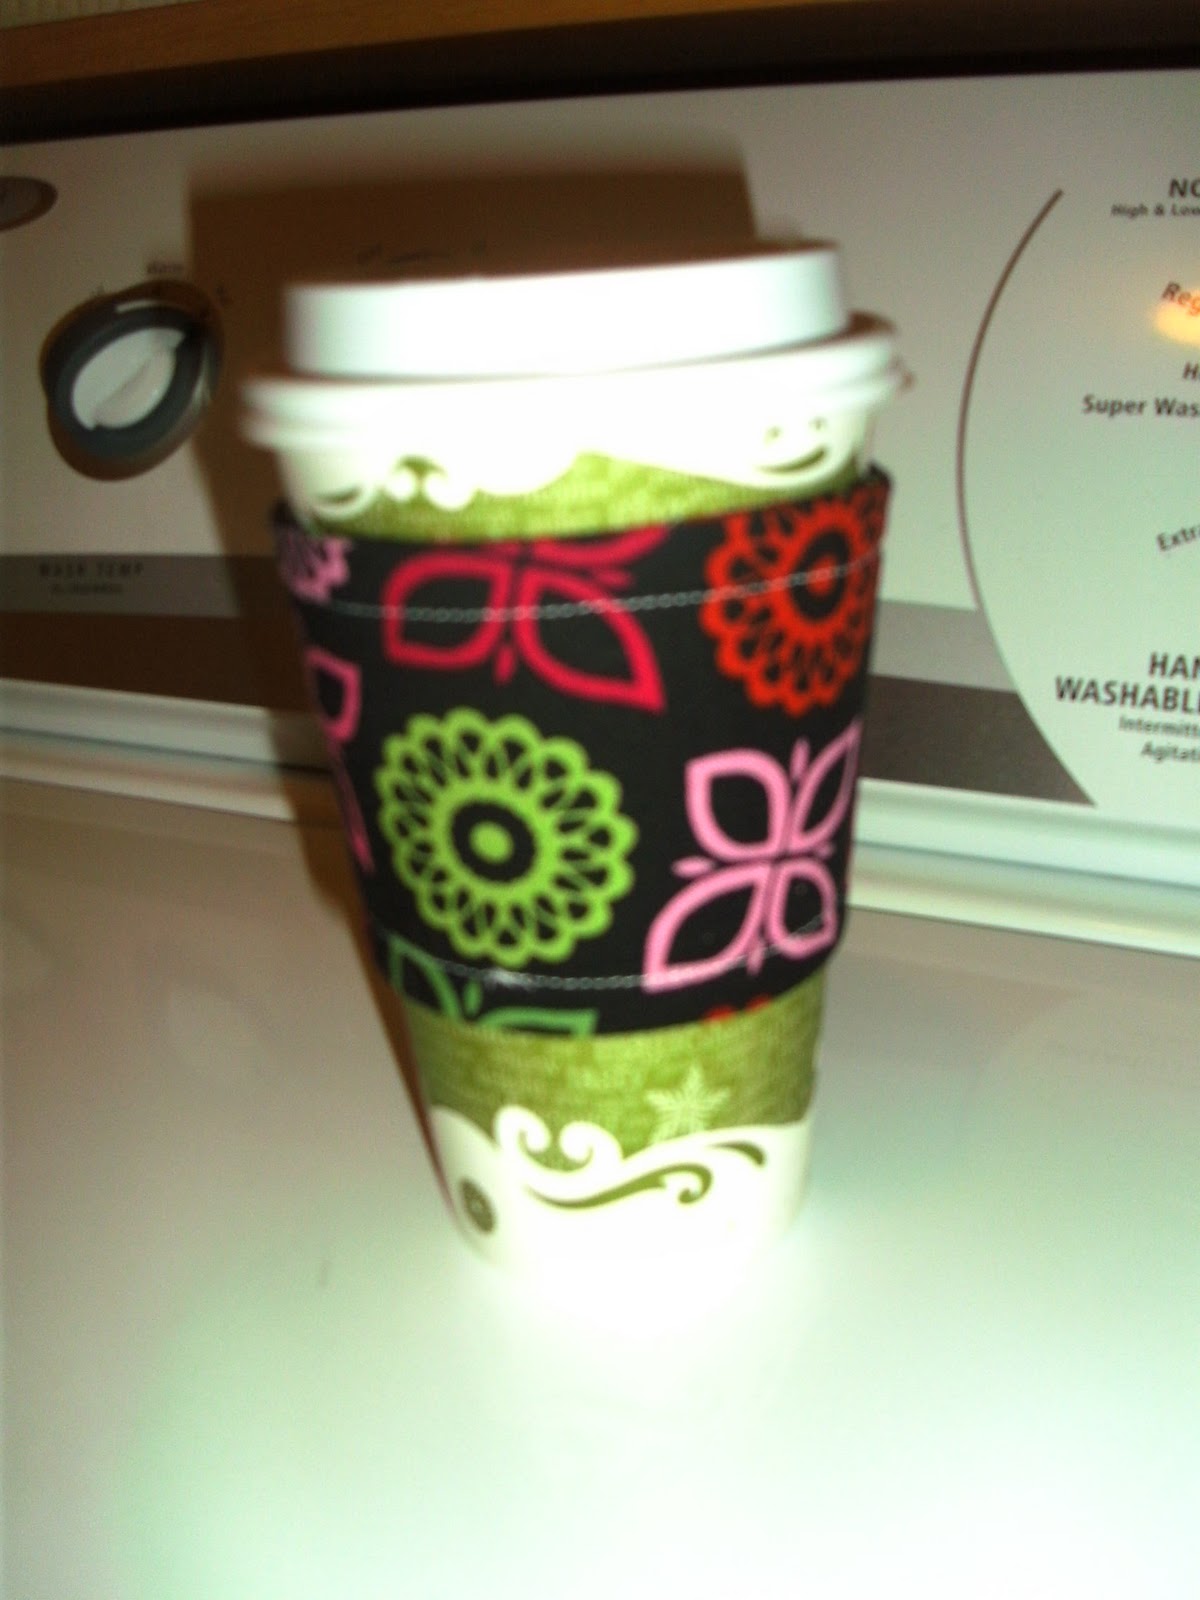
Day 3- Winner of the Cup Sleeve & Gift Card: Clare
Day 4-Winner of the Hand Towel Apron: Lisa Dawn
Day 5- Winner of the Cake Stand: Lisa

P.S. Since Clare wanted the Green cup sleeve and I originally pulled Rachel Dawn's number but she had won already, I am sending Rachel the black cup sleeve as well.
Whew! Hope this seems fair, I tried my hardest!
P.P.S. I realized Kelly didn't win ANYTHING at all, and she is one of my biggest fans! So if she sends me a comment letting me know which project was her favorite I will see what I can do.:)
I really did enjoy sharing all my ideas with you. So much in fact that I am still gonna post a couple of super fast ones this week. So be watching for them. However I won't be raffling them. Mostly cause they are things that wouldn't mail well, or weren't very big, and because it is getting to close to Christmas to try and mail them out in time. Thanks so much for all your fun comments last week, you made my days brighter!

Friday, December 10, 2010

This Gifty Takes the Cake!

The Gifty today can't even really be qualified as a craft, it is SO stinkin Easy! However it is truly cheap & looks good too, so I will share all two steps involved;)

Today's Gifty is a Cake Stand!

Gather your supplies: One Plate of your choice, any candle holder that has a flat top & bottom, & E6000 glue.

Now ready for these complicated step by step instructions?!
1) Turn your Candle Holder upside down and apply a strip of glue all the way around the edges. ( I know it looks like I put glue in the middle, I did NOT that is just the color of the glass)

2) Take your plate and turn it upside down & place candle holder in middle glue side down.


3) Allow to dry for 24 hours. And Voila you have this cute little cake/cookie/candy stand to take to your neighbor or give as a perfect Hostess gift at a Christmas Party. And it took you like 2 minutes and cost less than $5 bucks:) I bought my plates at Tjmaxx or Kohls and paid about $3 a piece for them. Then candle holders came from Micheals or Kmart and I paid less than $2 for each of them.

So since everybody cried "Foul" yesterday, I am giving away EITHER example today. So just leave a comment telling me which one, and what yummy thing you would put on it. All winners will be listed sometime this weekend.
P.S. The Poinsettia one is much prettier in person, I really need a new camera!

Thursday, December 9, 2010

Tie this gifty on for size!

Today's Gifty is by far my favorite idea this week. It is an adorable dish towel apron! This little project takes less than 10 minutes to complete, cost less than $5, and is SO cute!

All ya need to get started is a generous size dishtowel (usually any that aren't made from terrycloth or such work). Mine was from Target's last year clearance and it was about 18x28.

You will also want some good width ribbon, and any embellishments if you so choose. Now begin by laying your towel out and cutting it about 5/8ths the short way. This does not need to be an exact measurement you are just going to iron down and hem anyway. So basically cut it as short or long as you want:)

After you iron your hem down turn right side up and lay about 6 feet of ribbon across the top where your hem will be. If you want a side bow like I used, just position your ribbon about a foot or so more to one side. Run a straight stitch across the top & bottom of the ribbon to anchor in place and Wal-lah! cutey Christmas apron finished!

Now I loved my snowman one so much, and he goes with my decor so I can't give him away. However I made my favorite readers a different example, and one commenter can win the apron pictured below. I had trouble finding towels that had cute appliques already on them like the snowman one, so I bought a cute patterned towel and embellished it with some fabric flowers. The flowers are simply safety pinned on so they can be removed when you wash the apron. Now go buy towels and whip a dozen of these cuties for all the gals you know!;)

Wednesday, December 8, 2010

A cup of comfort and joy!

Today's gifty is probably the most complicated idea I will do all week. However I was determine to conquer it so here is my attempt:

 It's a reusable cup sleeve! I actually have wanted to try these for a while now, and now that I have figured them out I have made like 6!
I used the tutorial found here as a basic guide Reusable Coffee Sleeve. However I modified it by making my pattern larger and lining my regular fabric with felt for durablity and thickness. If you use flannel this isn't neccassary.
So first I took a disposable sleeve and made a pattern on some cardstock and added a generous 1/4 inch for seam allowance.
I then traced around the pattern on my fabric and cut out.


If you are lining with felt this is where you would trace around the disposable sleeve directly onto your felt and cut out. You want your felt to be slightly smaller than your fabric, this is why you use the paper sleeve. Place your fabric with right sides facing together and sew as directed in the tutorial above.
Turn you sleeve right side out and finish with a top stitch. This is actually the most complicated part, but once you get the hang of it it isn't so bad. 


And TaDa! You have an adorable, washable, reusable coffee sleeve to tuck in your purse for all those Starbucks runs:) This also makes a fabulous gift! Which is why I am offering 1 commenter their choice of either sleeve below and a $5 dollar gift card! Just leave a comment telling me which sleeve you prefer. 


Disclaimer: If you sew on a regular basis or well, you may not want to enter the drawing! I am by no means professional level and there are plenty of flaws, however I thought the giftcard might balances that out;)

Tuesday, December 7, 2010

Sugar & Spice and....NUTS!

Today's Gifty is SO ridiculously easy, however it is delicious and most people adore them! We are gonna make Sugar & Spice Nuts. These are similar to the candied nuts you get from Vendors, however mine aren't quite as sweet not as heavily coated. You won't need much for this project, so lets get started!

Grab the following ingredients: Sugar, Cinnamon, Nutmeg, Clove, Salt, Egg White, and 3 cups of a plain unsalted nut(s) of your choice. I will post the actual recipe at the end of my post.

You will mix all the ingredients together in one bowl in then spread on a greased jelly roll pan.

 Bake in oven for 1 hour at 250* and then let cool COMPLETELY before removing. Scoop some of these little guys into a jar, add some embellishments and you have a yummy gift that everyone I have ever given them to LOVED. As in asked for the recipe! 


The recipe for the Nuts is as follows:

1/2 Cup Granulated Sugar
1/2 tsp Salt
1/4 tsp Cinnamon
1/4 tsp Nutmeg
1/8 tsp Cloves
1 Large Egg White
3 Cups unsalted Nuts. ( I used Pecans, Almonds, & Peanuts this time. However I normally use Cashews instead of Peanuts. Honestly my husband and I think a thing of nothing but Pecans would be divine!)

Mix all ingredients together in large bowl and spread on greased jelly roll pan. Bake at 250* for 1 hour and let cool completely.  Note: NO matter how much you grease the pan these guys STICK, you have to kinda scrape them off. If you try this with one of those mats and have better results PLEASE let me know!

And that my friends is IT! So easy, so yummy, and so fun to give. Make sure you leave a comment if you want to win the jar I made last night that is in the picture. I am giving these to my kids Awana teachers, and our Schwans guy:)

Monday, December 6, 2010

Let the Week of Gifties & Giveaways Begin!

So I am super excited to share this week with you! I have several fun little crafty/cooking things that I made, and I will be showing you at least one idea every day this week. Then I will randomly select a commenter to give the example away to! How fun for me & you:) For simplicity sake I will be selecting the winners from the entire week this weekend. Make sure when you leave a comment I have some way to contact you encase you win and I need your address.

So with out further ado...Monday's gifties is a Ribbon Twirler. This cute little idea is perfect for any little girl and a snap to make. And if that isn't enough incentive the total cost is less than $3! Here is what you will need to start this project: A 12 inch piece of dowel rod (mine was about the same diameter as a dime), 3 to 4 coordinating ribbons in different widths, acrylic paint to match, and one "eye" like from a hook and eye set. I found these at Lowes in 2 & 3 packs depending on size for less than a buck.


At this point you will probably need to drill a hole in the end of the dowel rod so that it is easier to insert the eye. I had my handy husband do this;) Then using the eye as a hand hold proceed to paint your rod the color of your choice.
After painting the rod lay across a paper plate to dry. This won't take long! I then applied a second coat just for good measure, and allowed it to dry also.

 While your rod is drying, cut 5 feet of each ribbon and then make a separate small loop ( about the size of a half dollar) from your thinnest ribbon and knot it closed. Take your other ribbons and barley thread them through your ribbon loop, leave just enough ends to either sew or hot glue the ends down. So now you should have a loop with the 5 feet of different ribbons trailing down it:)


Take your loop and squeeze it through the small slit on the "eye". This basically finishes your Ribbon Twirler! You can hot glue the small slit shut if you are worried about the ribbon coming back through, but I didn't find it necessary on mine. I also would think a nice coat of clear shellac would a bonus too, but I didn't have any. This is what the finished product looks like:)


My daughter LOVED this thing and actually requested we make some for her friends for Christmas. I think they would be great stocking stuffers! It is just a fun silly girly thing to make:) Hope you enjoy and be sure to leave a comment if you would like to win the pink & black one from my demo!

Friday, December 3, 2010

Winners! & More to Come...

So I used the website Random.org to decide on the winners for the shopping list(s), and the results were #1 & #2. So Clare & Lisa Dawn you are the big winners:) Since Clare wanted the Country one, I will send Lisa Dawn the Contempo one. I will get them in the mail this weekend, hope you enjoy!

Now if you didn't get overly excited about the notepad idea, or if you were bummed you didn't win, stay tuned! All next week is Gifties & Give Aways on Robyn's Ramblings. I will be making several little cute craft & food items that would make easy gifts, and every day I will give my example away! I am SO excited to do this, it will be fun & different:)

Wednesday, December 1, 2010

Making a List....Giving it Twice!

So on this first day of December, I am very much in the spirit of Giving! I did some Christmas shopping today, and of course I reference my handy shopping list several times. I love, Love, LOVE a list! Don't you? So since I know you all agree I am going to share this super cheap & cute idea for you very own homemade shopping list pads. AND....because I feel like giving gifts today, I am going to give the two examples I made away also:)

But first, how to make this little guys encase you want to make some as gifts or if you are like me and go through list pads weekly;)  All you will really need to start these is small legal pads (that you can have the office store cut in half for you), sturdy scrapbook paper, embellishment, adhesive of your choice, and preferable a paper cutter. However scissors will work, I am just lazy:)

Start by cutting your scrapbook paper 2 & 5/8 of inch across and 3 & 1/2 inches long. Now I got kinda fancy here and used a punch to make a pattern on the edge of my paper but you can leave it straight it is still very cute. I then measured up about 1 & 1/4 inches and scored a 1/4 inch space that will fit the top of the pad. This just makes it lay nice, you don't have to score. You can glue down your paper to the back and fold over the front with almost the same effect.


After you have scored/ folded you paper attach to list pad with preferred adhesive and then embellish with Ribbon, Buttons, Stickers, Etc. I think the adorable little paper flowers my sister Clare makes would be super cute, but I haven't had the patience to try any. And that my friends is IT! In like 3 minutes you have cutesy, personalized shopping pads.


This is the one I made for the blog, I will call this one "Country Christmas".
And this one below is one I made cause I am enamored with the colors Black, White,& Red this season. SO I am calling this one "Contempo Christmas"
If you want to get one of these guys in the giveaway, just leave a comment telling me which one you prefer and how awesome it is that these are so quick and cheap;) I will randomly select 2 people on Friday and mail the list pads out this weekend! Merry Christmas & Happy Shopping:)