Pages

Showing posts with label Recipes. Show all posts

Thursday, April 11, 2013

Pinned It, Did It!!! Baked Tacos

I am determined to actually post something besides my adorable every growing baby! SO here is my first of what will hopefully be a series "Pinned It, Did It!"


I have had this pin on my "Just Say Yum" Board for forEVVAHHH! But I am glad I waited  because my first pin was from "One Good Thing by Jillee", however recently a new version floated across Pinterest from "Mommy I'm Hungry" and that version seemed more up my alley. This is how I made it, modified it, and what I will do different next time:

Baked Tacos
Ingredients:
1 lb Ground Beef
1 Small Onion chopped
1 Packet Taco Seasoning
1/2 Small Can Green Enchilada Sauce
1/2 Can of Refried Beans
10-12 Hard Taco Shells
2 Cups Shredded Cheese of Choice ( I ♥ Sharp Cheddar, but you may prefer Mexican Blend)
Toppings of Your Taste: Lettuce, Tomatoes, Olives, Sour Cream, Guacamole

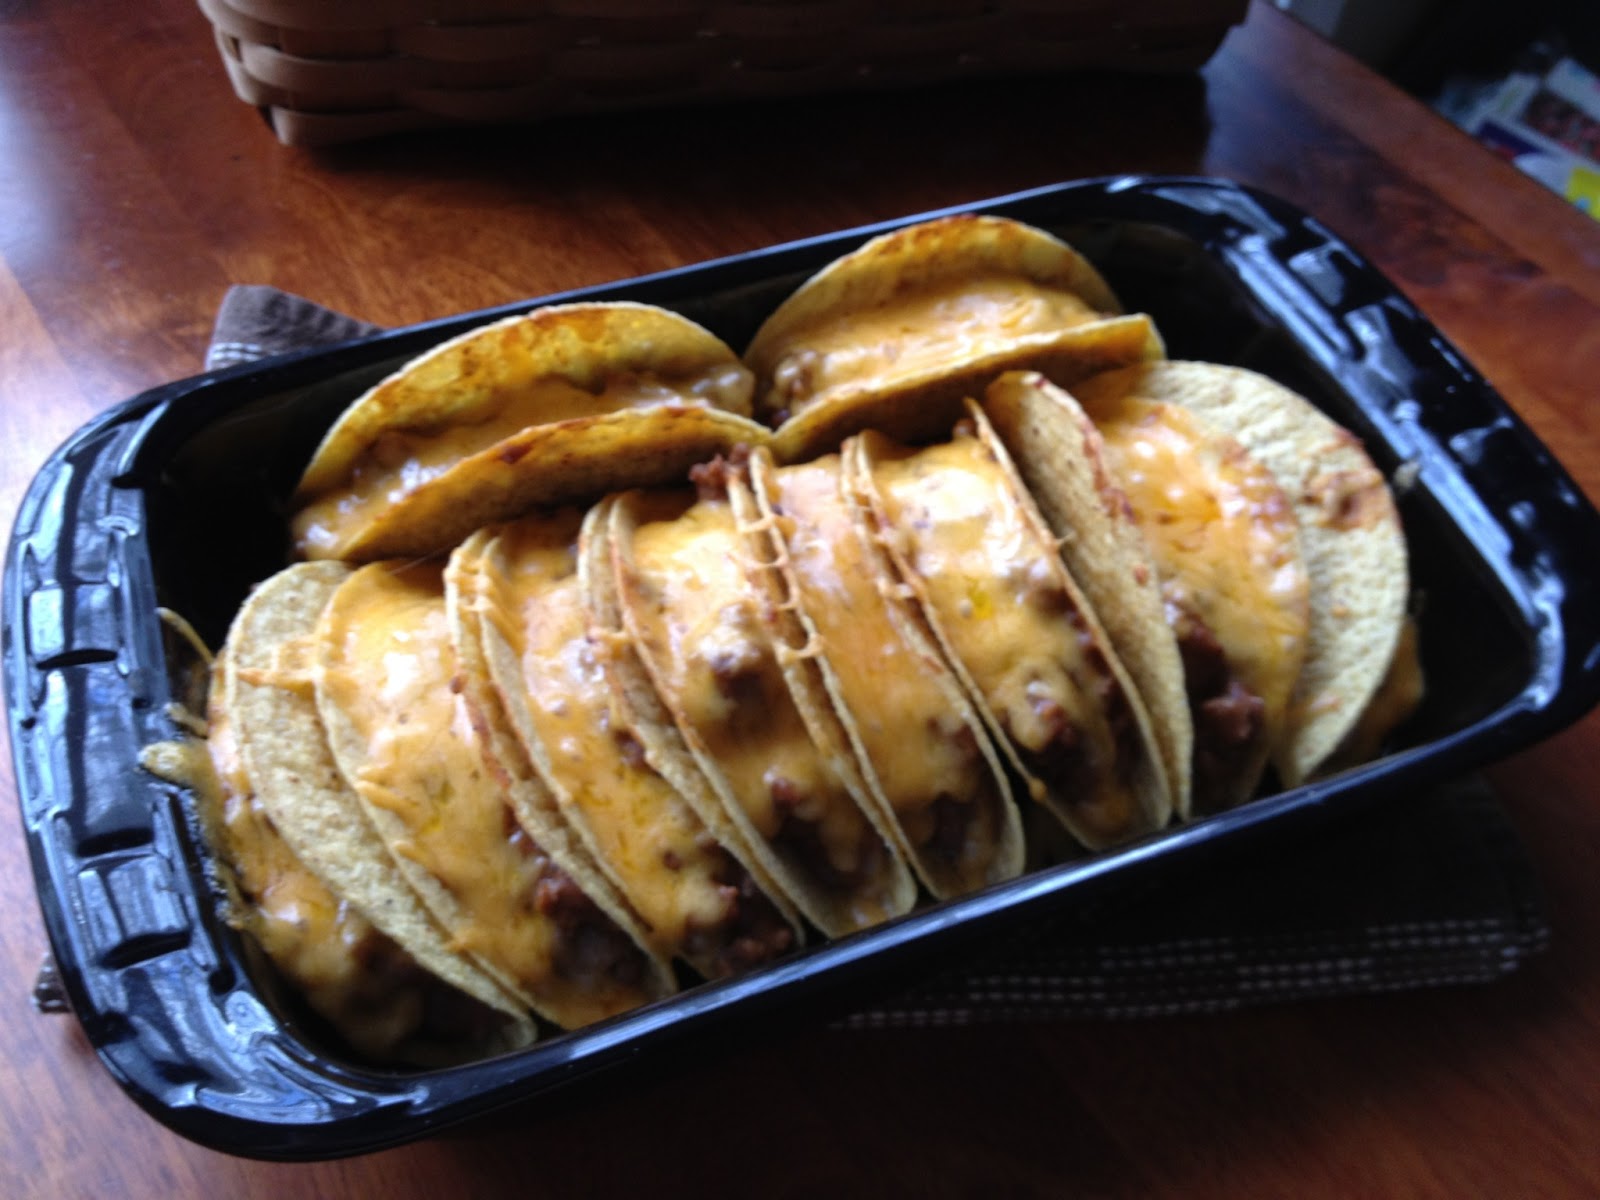
Directions: Brown Beef with Chopped Onions. Add your Taco Seasoning, 1/2 can of Enchilada Sauce, and Refried Beans and mix well with Beef. Stand your taco shells in a dish, and then stuff with the meat mixture. Then top each Taco with more shredded cheese than you should;) Place in oven preheated to 425* and heat for about 10 minutes or until cheese is melted. Remove and serve with toppings of your choice!


They look yummy,huh? Well they were tasty, however as my daughter noted "Mom the shells are soggy":/ So next time I think I will try double heating the shells. I will cook them according to the pkg directions, then fill them and bake again.
Here is the pin link for the original recipe from "Mommy I'm Hungry" :http://pinterest.com/pin/69665125458465844/
You will note that I chose not to make as a big of a batch as she did. I was only feeding myself and a 9 &10 year old. So 10 tacos was plenty with leftovers (Ok not that many leftovers, I may have eaten 2 and then like 2 bites of the leftover one:/) I also have this thing about not putting tomato sauce in my Mexican recipes, it seems more like a Italian cuisine thing. So instead I opted to leave the can of chilies out and use a can of Green Enchilada Sauce that had been hanging out in my pantry for much to long. I thought the end result was a wonderful filling, it had a slight heat from using Green Sauce but not so much that my kids wouldn't eat them. You could add more sauce or beans if you don't mind your filling a bit runny. Overall I am sure my modified version will be making a reappearance on our table!

Monday, December 12, 2011

Muffin Tin Monday- Sweet & Swirly Oh...and my "homemade" Poptarts:P

Today's muffin tin was one of my more time consuming ventures, however it still only took about 10 mins start to finish. And the kids were ecstatic with the results, and that is the real goal:)
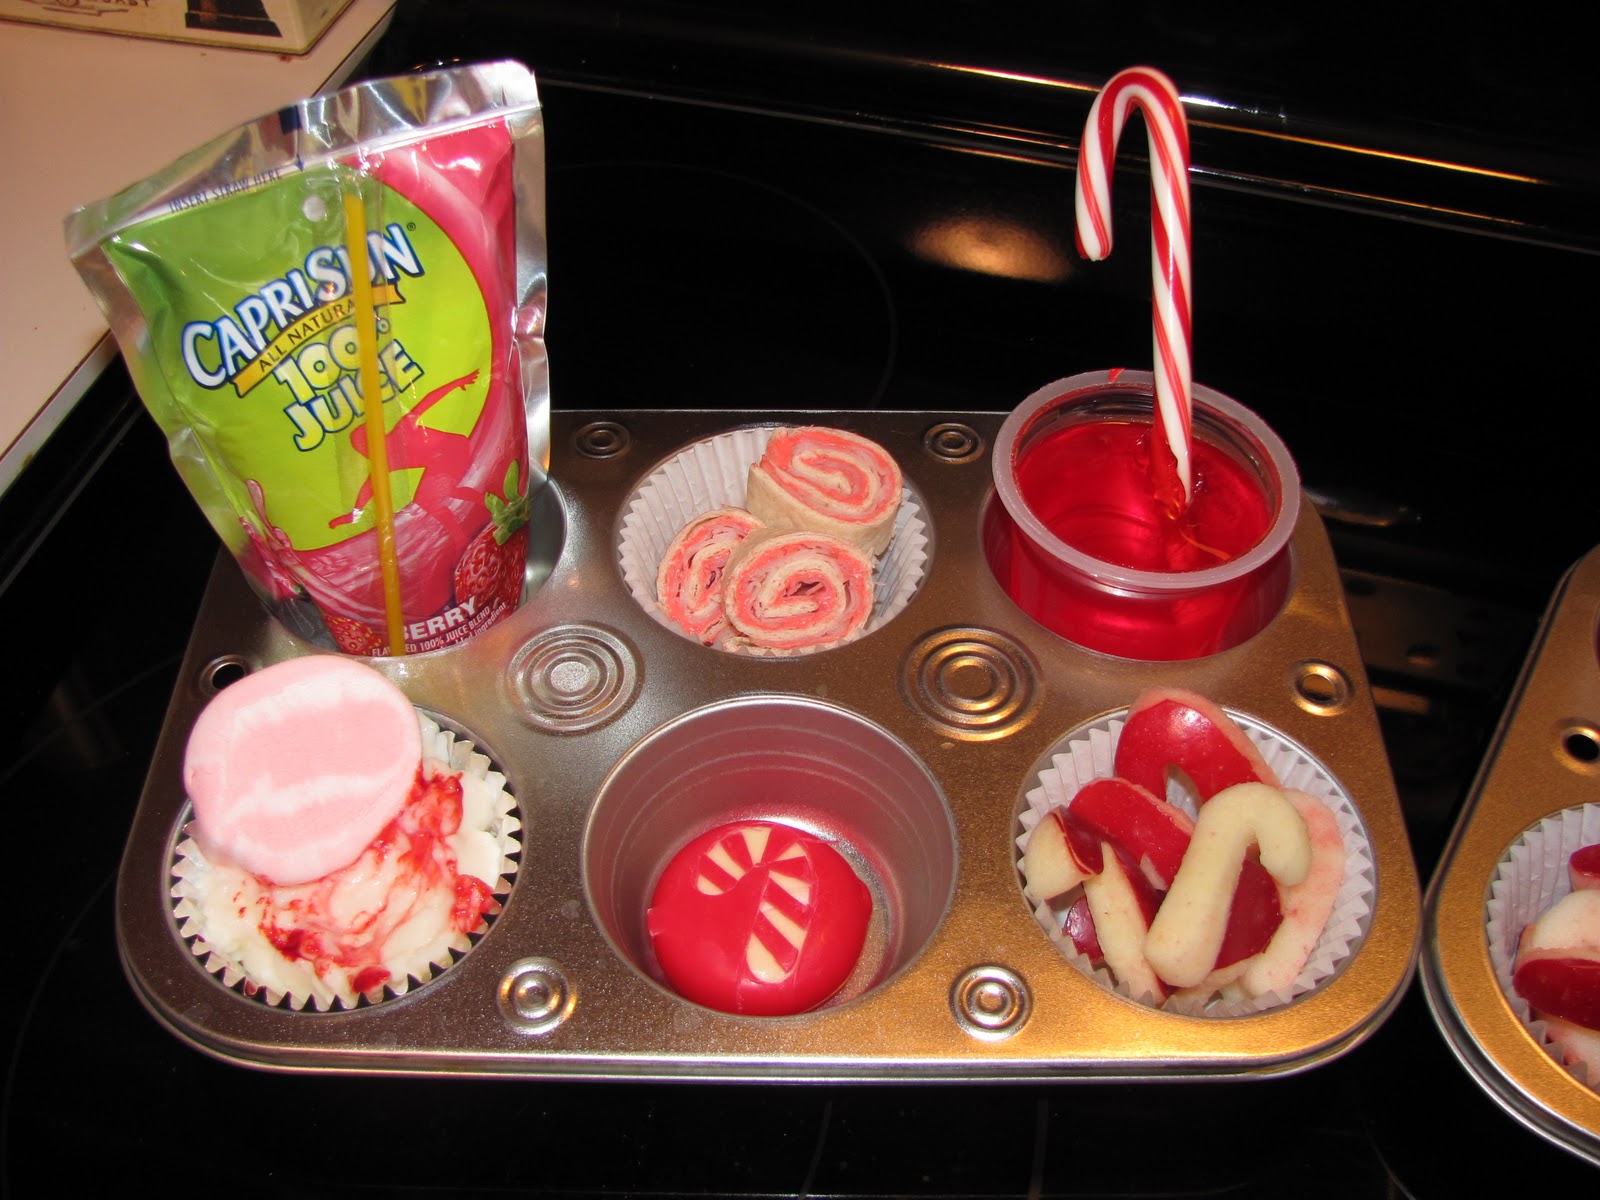
The tins today were based on Peppermints & Candy Canes:
 The tins contain a Juice Pouch, Turkey Tortilla Pinwheels, Jello Cup, Candy Cane shaped Apples, Babybel cheese with a CandyCane Cutout, and Vanilla Yogurt with a red swirl with a big fat Peppermint Marshmallow!


I dyed the cream cheese in the pinwheels, and used a small cookie cutter on the apples & cheese. Hooking this Tin up at Muffin Tin Mom

I also attempted homemade Poptarts this morning. I am going to be honest and say they were rather dissapointing. If you LOVE the flavor of pie crust all by itself these are the pastry for you! However I thought they were rather bland, so if you have any ideas on how to "spice" these babies up let me know. All I did was take a premade piecrust & cut it into circles with my biscuit cutter. Then I dolloped a tsp of jelly in the middle ( I didn't want to put more in so it wouldn't ooze out!). I topped the circle with another pastry circle, and then sealed the edges with a fork. I used an egg wash on the top to add sugar sprinkles for texture and looks. They looked nice & yummy...but not so much:/

Monday, February 14, 2011

Love in Cookie Form... Sprinkles Optional!

So I LOVE a nice soft sugar cookie. However I am not a big fan of the mess or the length of time to create picture perfect sugar cookies. So sadly sugar cookies appeared from my oven about once a year. Then my life was changed when I kept blog hopping and seeing recipes for Sugar Cookie Bars. Now I am not usually a bar kinda gal unless it is a good ole brownie. However I ♥ these babies!!! I get all the yummy goodness of a chewy soft sugar cookie in less amount of time than it usually takes one batch to bake! So here is my version:

Super Sugar Cookie Bars
1 cup butter, softened
2 cups sugar
4 eggs
2 teaspoons vanilla
5 cups flour
1 teaspoon salt
1/2 teaspoon soda

Preheat oven to 375 degrees. Grease a jelly roll pan/stone. Cream butter and sugar until fluffy. Add eggs and vanilla. In a medium bowl, combine flour, salt, and soda and gradually add to creamed mixture. Press dough into jelly roll pan with greased hands. Bake for 12-15 minutes. I truly recommend 15 minutes especially if you are using a stoneware bar pan. They will be a beautiful golden brown around the edges when done. Remove from oven and cool completely before frosting. If you have a buttercream frosting recipe you love, feel free to use it. I cheated and used canned frosting because I am lazy like that;) and then topped with sprinkles even though I rank those up there with glitter, because I love my children:)
I also recommend letting them sit for a few hours before you cut into bars if you want them to look "pretty" otherwise the frosting doesn't set up. However I will admit I can't usually manage this for the first half of the pan;P
P.S. If you like a thin crunchy sugar cookie these are NOT the cookie for you. Phew, had to get that disclaimer out there...

Thursday, April 15, 2010

Thursdays Theme- Cherries

Not sure I will stick with Thursdays as a "theme" day, however I was so excited about my purchase today at Sam's that I am really stuck on Cherries at the moment. Today while I was at Sam's I found Chudley's Cherry Blossoms! Now I will admit the berry kind are my favorite, but when you live in the sticks you will take whatever "blossom" you find. This lead me to think about other cherry items, both "likes" and "dislikes" . So since I LOVE a list I thought I would share them with you:)

Cherry Items I Like/Love:
  • Cherry Starburst
  • Cherry Blossom scent from Bath & Body (not Japanese Cherry Blossom!)
  • Cherry Turnovers (vs Apple Turnovers, but don't worry I will eat either!)
  • Black Cherry Juice from Welchs
  • Fresh Cherries ( Not sure which type, just not the tart ones )
Cherry Things that I Dislike/Hate:
  • Cherry scented CarFreshners (to sickly sweet!)
  • Cherry Preserves or Jam (to many chunks)
  • Cherry Pie (I don't like all the smooshy cherries)
  • Cherry Chapstick (makes me feel 6 years old)
  • Chocolate Covered Cherries (need I say more!!)
So I am sure that is not an all inclusive list so feel free to comment and let me know your likes/dislikes in the cherry category.

To round out this post I thought I would finish out with one of the only Cherry recipes I know. My mother in laws "Cherry Ice Box Dessert", she is somewhat famous for this dessert around her part of the country. This reminds me of a combo of 4 Layer Dessert and Cherry Cheesecake. Enjoy!

Goodman Cherry Ice Box Dessert
  • 2 sticks margarine (I use butter)
  • 2 Pkgs (Bricks) Graham Crackers finely Crushed
  • 2 Pkgs Dream Whip (you find this in the baking aisle in box)
  • 2-8 oz Pkgs Cream Cheese
  • 1/2 Cup Sugar
  • 2 Cans Cherry Pie Filling with some of the liquid removed ( I remove a lot of the juice personally)
Beat Margarine (I melt mine) and then mix in Cracker Crumbs. Press in bottom and up sides of 9x13 pan. Prepare Dream Whip according to package. Beat Cream Cheese with sugar in separate bowl. Combine Dream Whip mixture with Cream Cheese mixture. Spread over Graham Cracker Crust, then top with Pie filling. Let set up in Fridge for a couple hours. 
P.S. The original recipe called for 3 cans of cherry filling, my MIL said the cans used to be smaller. However I find 2 cans to be plenty! 
P.S.S. If you can't find Dream Whip you can subtitute Cool Whip. I will tell you though that Dream Whip does give it a little better consistency and changes the flavor slightly.